Master Virtual Drums in 30 Days: Beginner to Pro Drum Challenge
Ready to transform from drumming novice to rhythm master? Have you ever dreamed of playing the drums but felt held back by the cost, noise, or space? This is your chance. Join our 30-Day Virtual Drum Challenge, designed to take you from basic beats to stage-ready patterns using nothing but your computer keyboard.
This daily practice plan is perfect for everyone. Whether you've never touched a drum before or just want to sharpen your skills, this challenge will build your coordination, expand your rhythmic vocabulary, and develop the muscle memory needed to play with confidence. All you need is your keyboard and our free virtual drum set. Let's get started!
Your Virtual Drum Journey Begins Here
The first step in any new adventure is getting your gear ready. For this challenge, your instrument is right at your fingertips. Our goal is to make your online drumming experience as smooth and effective as possible. This section will help you set up your space, understand your instrument, and master the basic techniques for playing drums on a computer keyboard.
Setting Up Your Virtual Drum Workspace for Success
To get the most out of your daily practice, create a comfortable and focused environment. Find a quiet spot where you can sit upright with your keyboard at a comfortable height, similar to how you would sit at a real drum kit. Good posture helps with stamina and prevents strain.
Next, open up the virtual drums on your computer. We recommend using headphones for the best experience. Headphones will help you hear the nuances of each drum sound and block out distractions, allowing you to fully immerse yourself in the rhythm. Finally, turn on the "Show Key" feature on our site to see which keyboard key triggers each drum. This visual guide is essential for learning quickly.
Understanding Your Virtual Drum Kit: From Kick to Crash
Before you can play, you need to know your instrument. A standard drum kit has several key components, and our virtual drum kit mirrors this setup perfectly. Let’s get to know them:
- Kick Drum (or Bass Drum): This is the large drum on the floor, played with a foot pedal. It provides the deep, thumping pulse of the beat.
- Snare Drum: Positioned in front of you, the snare produces a sharp, cracking sound. It’s the backbone of most rock, pop, and funk grooves.
- Hi-Hats: These are the two cymbals mounted on a stand, played with a pedal or sticks. They create the steady "tss" or "chick" sound that keeps time.
- Toms (or Tom-Toms): These are the drums mounted above the kick drum. They come in different sizes to produce different pitches and are often used for fills.
- Crash Cymbal: This large cymbal creates a loud, explosive sound used to accent key moments in a song.
- Ride Cymbal: Similar to the hi-hat, the ride cymbal is used to play steady patterns, but it has a more sustained, ringing tone.
Take a few minutes to tap each key and listen to the distinct sound of each part on our virtual kit.

Mastering Keyboard Drumming: Hand Position and Technique
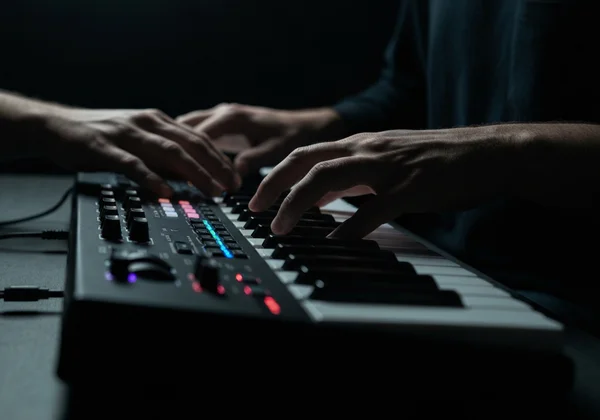
Playing drums on a keyboard requires a slightly different technique than using drumsticks. Your goal is to develop finger independence and muscle memory. Place your hands on your keyboard in a relaxed, natural position. You don’t need to press the keys hard; a light, quick tap is all it takes.
Think of your index and middle fingers as your primary "sticks." Assign one hand to the hi-hats and snare, and the other to the toms and cymbals. For the kick drum, which is often played with your foot, you can use your thumb or a designated finger on your non-dominant hand. The key is consistency. Find a hand position that feels natural and stick with it. This will help you build the muscle memory needed for faster, more complex patterns later in the challenge.
Weeks 1-2: Building Your Foundation
The first two weeks are all about building a solid foundation. We'll focus on developing basic coordination between your hands, understanding time, and playing your very first recognizable drum beat. Don't worry about speed or perfection. The goal is to get comfortable with the basics and have fun.
Days 1-7: Basic Hand Coordination and Simple Beats
Your first week focuses on activating your drumming muscles. Begin with simple patterns on just one or two drums. Try playing steady eighth notes on the hi-hat (1 & 2 & 3 & 4 &). Once this feels comfortable, add a snare drum hit on beats 2 and 4.
The focus here is timing and consistency. Can you keep the space between each hit even? Use a metronome if you need help—there are plenty of free metronome apps online. Spend at least 10-15 minutes each day on these simple exercises. It might feel repetitive, but you are building the essential hand-eye coordination that all drummers need.
Days 8-14: Introducing the Kick Drum and 4/4 Time
Now it’s time to bring your "foot" into the mix! This week, we introduce the kick drum. Most popular music is in 4/4 time, which means there are four beats in every measure. We will start by playing the kick drum on beats 1 and 3, while continuing the snare on 2 and 4.
This is a classic coordination challenge for new drummers. Go slowly. Very slowly. Play the pattern one beat at a time: Kick (1), Snare (2), Kick (3), Snare (4). Repeat this until it feels automatic. Then, add the hi-hats on top, playing steady eighth notes. This combination of kick, snare, and hi-hat is the core of countless songs.
Your First Groove: The Classic "Rock Beat" Pattern
By the end of week two, you’ll be ready to play one of the most famous drum beats in the world. It’s the foundation of rock, pop, and countless other genres.
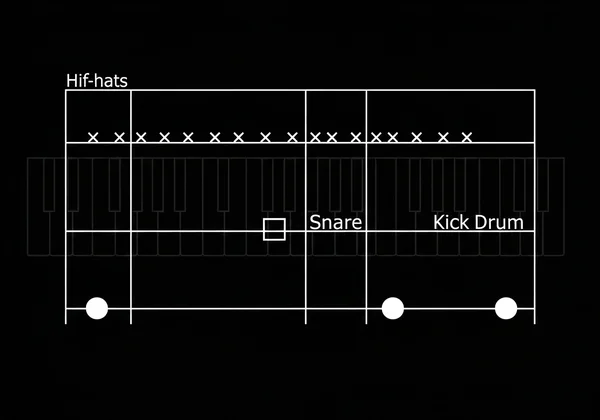
Here is the pattern:
- Hi-Hat: Play steady eighth notes (1 & 2 & 3 & 4 &).
- Kick Drum: Play on beats 1 and 3.
- Snare Drum: Play on beats 2 and 4.
Head over to the online drum kit and try putting it all together. Congratulations! You are now officially playing a drum groove. Practice this beat until you can play it smoothly without thinking. Try playing it along with your favorite simple rock song.
Weeks 3-4: Expanding Your Rhythmic Vocabulary
You've built your foundation. Now it's time to add some color and complexity to your playing. In weeks three and four, we will explore more intricate rhythms, learn how to add fills, and discover how to apply your skills to different styles of music. This is where your creativity starts to shine.
Days 15-21: Funky 16th Note Patterns and Ghost Notes
Let’s pick up the pace by introducing 16th notes. Instead of counting "1 & 2 &", we now count "1 e & a 2 e & a". Try playing steady 16th notes on your hi-hat. It will feel much faster! This foundation is essential for funk and R&B drumming.
We'll also introduce "ghost notes"—very soft snare hits between the main beats. On a keyboard, simulate these by tapping the snare key very lightly. Ghost notes add a subtle, groovy texture to your beat. Practice playing a simple rock beat, but add quiet ghost notes on the "e" and "a" of the count.
Days 22-28: Adding Drum Fills and Dynamic Control
A drum fill is a short rhythmic pattern that breaks up the main groove. It signals changes in the music, such as moving from a verse to a chorus. Fills are your chance to be expressive. A simple fill could be moving from the high tom to the low tom in four quick notes at the end of a measure.
This week, practice playing your rock beat for three measures and then playing a simple fill in the fourth measure. We will also work on dynamic control—learning to play loud and soft. Try playing a beat very quietly, then gradually get louder, and then quiet again. This control is what makes a drummer sound musical. Explore these ideas on the free drum machine.
Week 4: Applying Your Skills to Different Music Styles
Your skills are now versatile enough to explore different genres. A simple change in where you place the kick and snare can completely change the feel of a beat.
- For a Blues Shuffle: Try playing a "swing" rhythm on the ride cymbal instead of straight eighth notes on the hi-hat.
- For a Reggae Beat: Play the kick drum and a rimshot (often the same key as the snare) together on beat 3. This is called the "one drop."
Spend this week listening to different styles of music and trying to replicate the basic drum patterns. You'll be surprised at how many beats you can now play.
What's Next After Your Virtual Drum Challenge?
Wow, you've completed the 30-Day Virtual Drum Challenge! Think about how far you've come—from learning the parts of the kit to building beats, exploring rhythms, and even playing your first fills. You’ve proven that you don't need an expensive drum set to learn. All it takes is dedication, a keyboard, and the right tool.
You've built a strong foundation in coordination, timing, and rhythmic vocabulary. But this is just the beginning of your drumming journey. The key to becoming a great drummer is consistent practice and a passion for rhythm.
So, what's next? Keep playing! Continue to challenge yourself by learning new beats from your favorite songs, practicing your fills, and even trying to create your own patterns. The best part is, your instrument is always ready for you. Fire up VirtualDrums.org anytime inspiration strikes and keep that rhythmic fire burning.
FAQ Section
How much time should I dedicate to each day's challenge?
We recommend 15-20 minutes of focused practice each day. Consistency is more important than duration. A short, daily session is more effective for building muscle memory than one long session per week.
Can I complete the challenge on a mobile device?
Yes! VirtualDrums.org is fully responsive and works great on tablets and smartphones. You can tap the drum parts with your fingers, which is a great way to practice rhythms on the go. However, for developing finger independence for keyboard drumming, a computer is recommended.
What if I miss a day of the challenge?
Don't worry! This is a self-guided challenge, so there's no penalty. Just pick up where you left off. The goal is progress, not perfection. The most important thing is to keep coming back to the drums and enjoying the process of learning.
How do I track my progress throughout the 30 days?
A great way to track progress is to record yourself. Use a simple screen recorder to capture a short clip of your playing at the end of each week. When you look back at your week one video from week four, you'll be amazed at how far you've come. You can do all of your practice right on our online platform.
What comes after completing the 30-Day Virtual Drum Challenge?
After 30 days, you should have the confidence to start learning your favorite songs. Use our virtual drums to play along with music. You can also dive deeper into music theory, explore more complex genres, or start creating and recording your own unique drum beats. The journey never ends.